If you're gonna eat bread, why not eat healthy bread? And if you're looking for a healthy recipe, you can't go wrong with the one found in the old testament.
"...take wheat, barley, beans, lentils, millet and spelt, put them in one vessel and make them into bread for yourself..." Ezekiel 4:9 (NAS)
Many iterations of this recipe have been developed over time, both commercially and by home bakers around the world. Some folks have shown interest in the way I make my bread. Here you go. The only thing I don't have in this recipe is millet, but only because I haven't made the effort to buy some to play with.
Note that this recipe makes a big loaf of bread. Over 5 lbs when finished. If you prefer a smaller loaf, you may want to experiment with reduced quantities to make less dough, or divide this dough produced by this recipe into multiple loaves.
Equipment
- Flour mill, electric or otherwise. We use an old-school Whisper Mill. I'm sure there are others that will do the job. If you don't have access to a flour mill, you may be able to find most or all of the ingredients pre-ground from boutique millers like Bob's Red Mill.
- Kitchen mixer, electric. Of course, you can always knead your dough by hand. My mother made bread this way throughout my childhood, and it always looked like a terrific workout (read, a lot of work). In our kitchen today, we use a Bosch Universal - also old-school - but I'm sure your Kitchenaid will work just fine.
- Measuring cups & spoons. I use a big 4-cup Pyrex cup to mix the water/honey solution, but you can probably do it in a mixing bowl.
- An electronic food scale. Why do I use an electronic food scale to measure ingredients instead of cup measures? Because Alton Brown said so.
- A big, non-porous bowl for the rise. My mom used plastic. I use stainless steel. Either works.
- A big, cast iron Dutch or French oven (i.e. pot), enameled or otherwise, with matching lid.
- A big oven peel/slider.
Dry Stuff
- Measure 3 tbsp iodized salt and set it aside. Why iodized? Meh, why not.
- Measure 3 tbsp active dry yeast and set it aside.
- Measure 500g of unbleached white bread flour and set it aside. Now, you may wonder how on earth they can derive white flour without the use of bleach. I have no clue. The mysteries of modern milling.
- Measure out the Ezekiel blend, which consists of 500g hard white wheat berries (others will probably work, but this is what they have at the local Costco); 250g farro; 150g pearled barley; 100g spelt; 50g lentils; 25g pinto beans; and 25g great northern beans. 1100g total. Grind in the flour mill medium fine and set aside.
- Keep a couple tablespoons of cornmeal handy, and a bit of extra flour, for the loaf shaping stage.
Regarding salt: don't forget it. Why? Because life is fleeting, and if you forget the salt, you will waste your hours producing a brick of roughage so tasteless you wouldn't offer it to a tiresome houseguest.
Regarding flour: experiment! The Ezekiel & flour blend above is the result of my own experimentation in the kitchen, where I've played mainly with the proportions of wheat to non-wheat grains. You may want to try all processed bread flour, or all ground wheat flour. Try changing the proportions of the non-wheat grains, or excluding them altogether. Try adding the millet to the mix, or some other grain you have access to. Try changing the proportions of dry-to-wet ingredients. Make it your own! Have fun!
Just don't forget the salt.
Wet Stuff
- Measure 100g (1/2 cup) olive oil and set it aside. Don't be cheap. Use the good stuff.
- Measure 960g (4 cups) of warm water, approximately 120 deg F (50 deg C).
- Measure 120g (1/2 cup) honey; stir it into the warm water and let it dissolve.
It may be possible to omit the honey and oil, and make up the difference with water. I've never tried it so I don't know what would result. In theory, one can bake bread with flour, leaven, water, and salt, so it should be possible. Maybe someday when I'm feeling particularly lucky I'll give it a try.
Mixing Stuff
- Dump the water/honey solution into the mixing bowl; stir in the yeast and let it sit for a couple minutes.
- Add the white flour, whisk to incorporate, cover and let sponge for 10 minutes. If it doesn't look "alive", add 1 tbsp more yeast into a cup of lukewarm water, incorporate into the sponge mix, and let sit for 10 more minutes.
- Once the sponge has sponged, turn on the mixer (use a dough hook) and add the salt (!), the oil, and the Ezekiel flour. Mix for 8-10 minutes. Voila: bread dough.
Rising Stuff
- Lightly oil the big bowl, and dump the dough into it. Turn it over once or twice, making sure the whole surface of the dough is oiled. This is important, for reasons that will become clear the first time you forget to do it. Cover the bowl with plastic wrap and put it somewhere cozy. Let it rise for an hour.
- Turn the dough gently in the bowl, deflating it and turning it in on itself before flipping it in the bowl. Let rise a second time for 45 minutes. Around this time, turn on the oven (with the cook-pot & lid inside) to 500 degrees F.
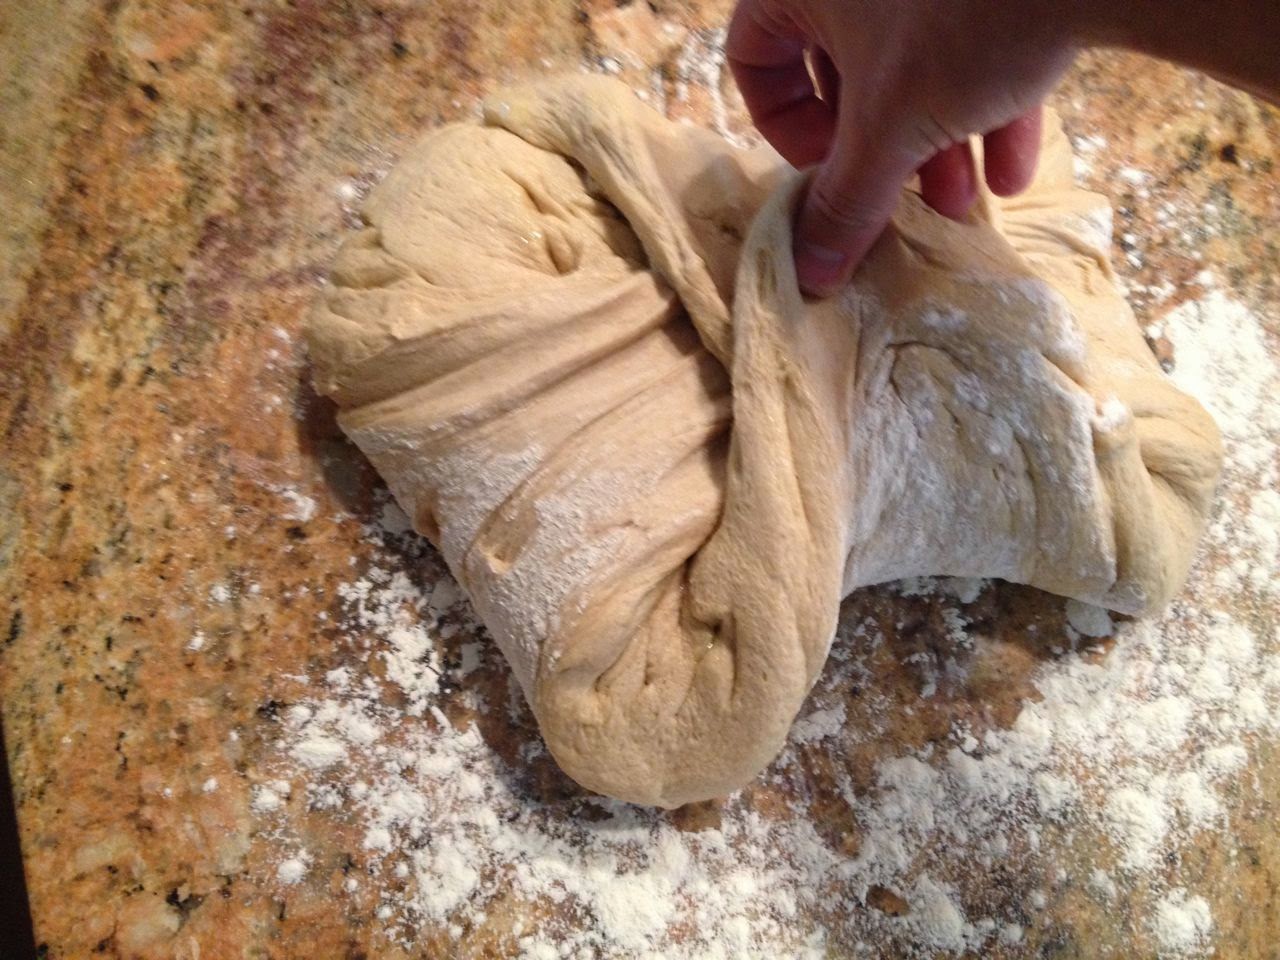
- After the second rise, dust the counter with some flour, turn out the dough onto the floured surface, and shape the loaf: pretend the blob of dough is a stop sign, and take each of the 8 'corners' (use your imagination) one at a time, gently stretch them outward, and fold them back into the center of the blob. Once you've got all eight, squeeze 'em all together. You've effectively 'tightened' the bottom surface of the dough, which, after you turn it over, will become the top of the loaf, but not until you...
- Sprinkle some cornmeal onto a flat peel/slider, and place the shaped loaf onto the peel, 'tight' side up. Rub the top of the loaf with some flour, cover with a towel, and let rise for 15-20 minutes.
Baking Stuff
- Once the oven and cook-pot are hot and the loaf has risen, slide the loaf off the peel and into the pot (easier said than done), score the top of the loaf, put the lid on the pot, and slide the whole thing back into the oven. Turn the heat down to 450 degrees F and set timer for 20 minutes.
CAUTION: the pot & lid are HOT, and will burn you without remorse or empathy if given the chance.
- When the timer rings, remove the lid and set the timer for 60 minutes.
- When the timer rings again, turn the loaf (hot!) onto a cooling rack, and give the bottom a knock. If it doesn't sound done, pop it back into the oven for a bit. Once it sounds done, hey way to go - you made bread!
Enjoy.
Regarding the whole pot & lid thing: Tartine Bread. I got this idea from a book thus named, wherein the author describes this process of using a heavy pot & lid in lieu of traditional open loaf pans. The lid serves to trap moisture in with the loaf for the first few minutes of the bake, which allows the surface of the loaf to remain elastic while the loaf finishes rising and takes its final shape in the loaf pan. I'm not exactly sure why this is so important, but I love the results (crust!), so I keep doing it.